The Anonymize feature lets you redact any sensitive details from an incident page before sharing it with a prospect or client. Use it to tell a compelling story about an attack without exposing the name, company, emails, or files of the actual victim.
Why This Matters for Sales
Real incidents are your most powerful sales tool. A prospect who sees an actual account compromise — complete with a timeline of the attacker’s activity, what they accessed, and how it was caught — is far more convinced than one who reads a spec sheet.
The Anonymize feature makes it safe to use real incidents in any sales context:
- Victory lap: Show a prospect a live-monitored incident that Petra caught and stopped fast. The story sells itself: attacker gets in, Petra flags it within minutes, account is locked, threat remediated.
- Cautionary tale: Run a free Petra Autopsy on a prospect’s tenant and show them what attackers were already doing in their environment. Use Anonymize to walk another prospect through a similar finding without revealing who the victim was.
How to Anonymize an Incident
- Navigate to any incident in the Petra dashboard.
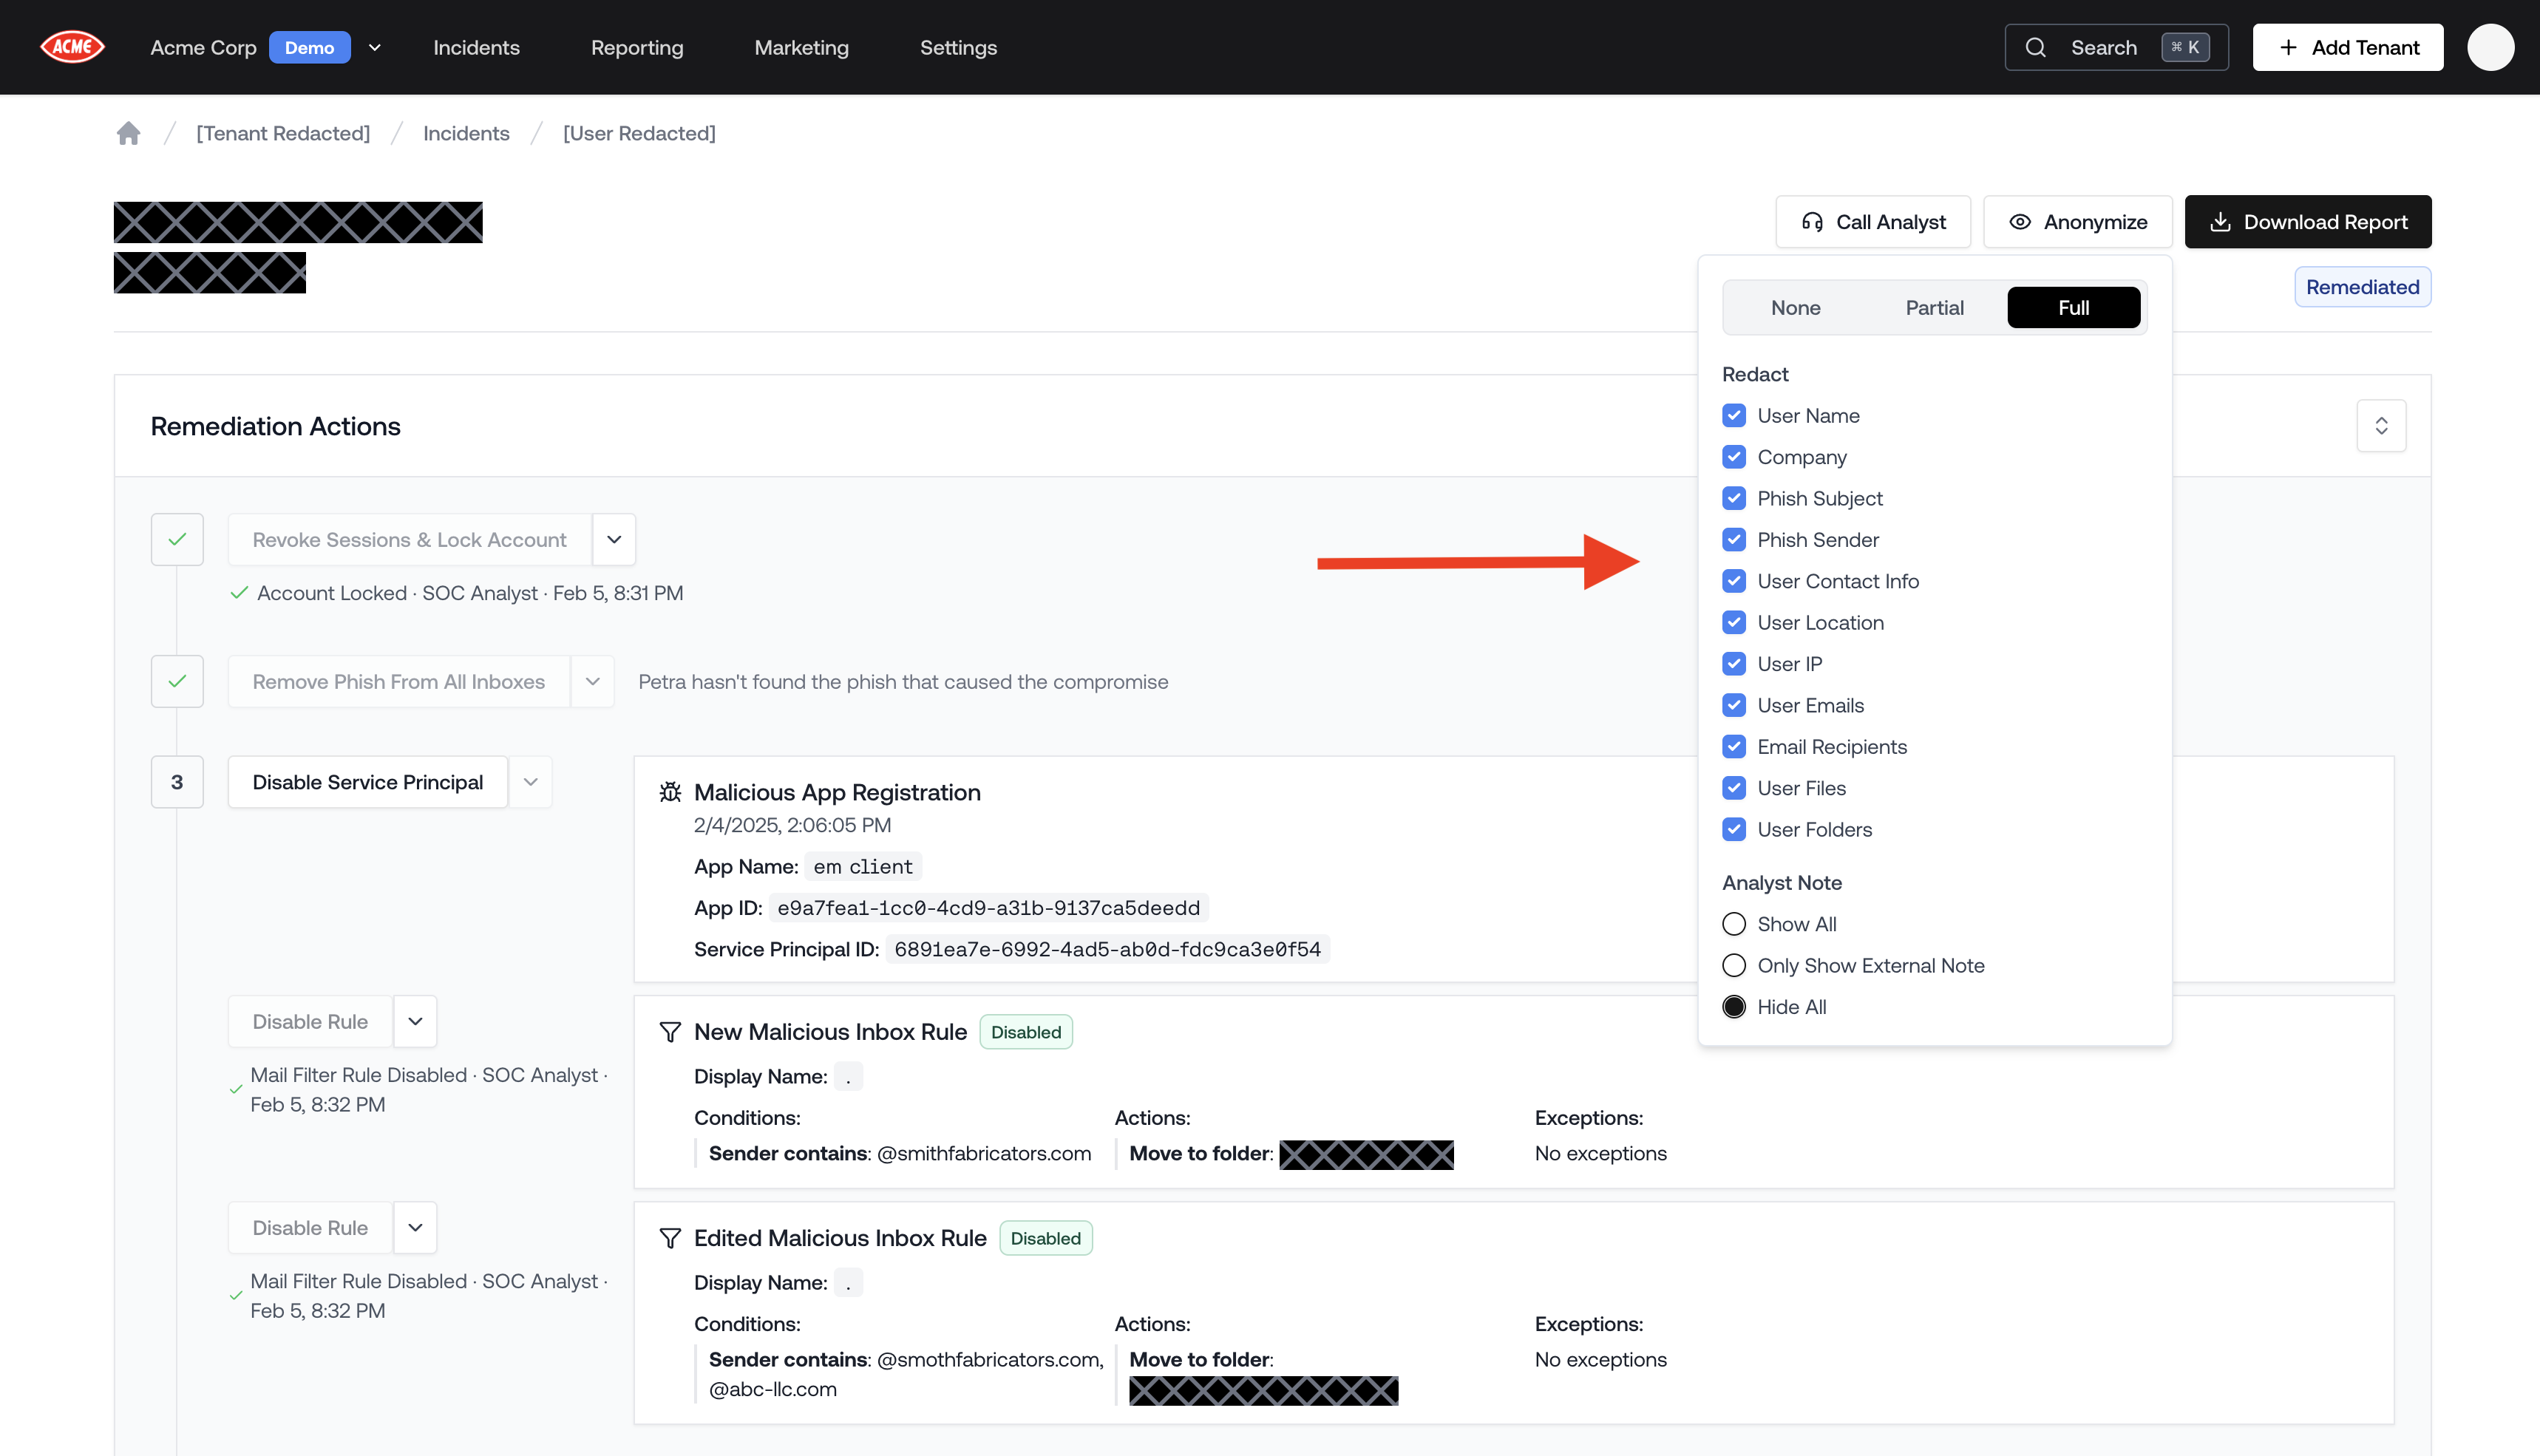
- Click the Anonymize button in the top right of the incident page.
- A menu opens with redaction options. Choose a preset or configure fields manually.
- The incident view updates instantly — the URL encodes your settings, so you can copy the link and share it directly with a prospect. Anyone opening the link sees the same redacted view.
Because anonymization is URL-based, you can prepare a link in advance and share it in an email, a slide deck, or a screen share without any risk of accidentally revealing the wrong information mid-demo.
Redaction Presets
| Preset | What It Does |
|---|
| None | No redaction. All information is visible. |
| Partial | Hides the victim’s name, company, contact info, location, IP, emails, files, and folders. Shows only the external analyst note. |
| Full | Hides everything in Partial, plus the phish subject, phish sender, and session IDs. Hides all analyst notes. |
Individual Redaction Options
If the presets don’t fit your needs, you can toggle any combination of the following fields:
| Option | What Gets Hidden |
|---|
| User Name | Victim’s display name, email, and UPN |
| Company | Tenant name (replaced with “[Tenant Redacted]“) |
| Phish Subject | Subject line of the phishing email |
| Phish Sender | Sender name, address, and recipients of the phish |
| User Contact Info | Emails, usernames, and UPNs throughout the logs |
| User Location | City, region, and country from login logs |
| User IP | IP addresses in all logs |
| User Emails | Email subjects and accessed email content |
| Email Recipients | To/Cc recipient addresses |
| User Files | File names and paths in SharePoint activity |
| User Folders | Folder paths in Exchange and mailbox logs |
| User Session ID | Session IDs throughout all log tables |
Redacted PDF Report
In addition to the in-app anonymized view, you can download a Redacted PDF Report — a fully redacted version of the incident’s Threat Remediation Report, suitable for sending to a prospect after a meeting. For download steps and a full breakdown of what gets redacted, see Redacted Incident Reports.
The Redacted PDF is great as a follow-up artifact after a prospect call. Send it so the prospect has something tangible to share internally — without any of their peer’s data included.
Tips for Using Anonymized Incidents in Sales
- Pick incidents with a strong story arc: The best ones have a clear phish-to-compromise timeline, meaningful blast radius (emails read, files accessed), and a fast Petra response. These are the ones that make a prospect say “what would have happened if no one caught this?”
- Use the Incidents List to find the right one: The Analyst Summary in the incidents list helps you quickly scan for the most compelling and diverse past compromises when picking one to share with a prospect. See the Incidents List Analyst Summary.
- Pair with the Example Prospecting Report: If you don’t yet have a live Autopsy for this prospect’s tenant, use the anonymized incident view alongside the Example Prospecting Report from the Marketing Hub to show both what real monitoring catches and what a full Autopsy finding looks like.