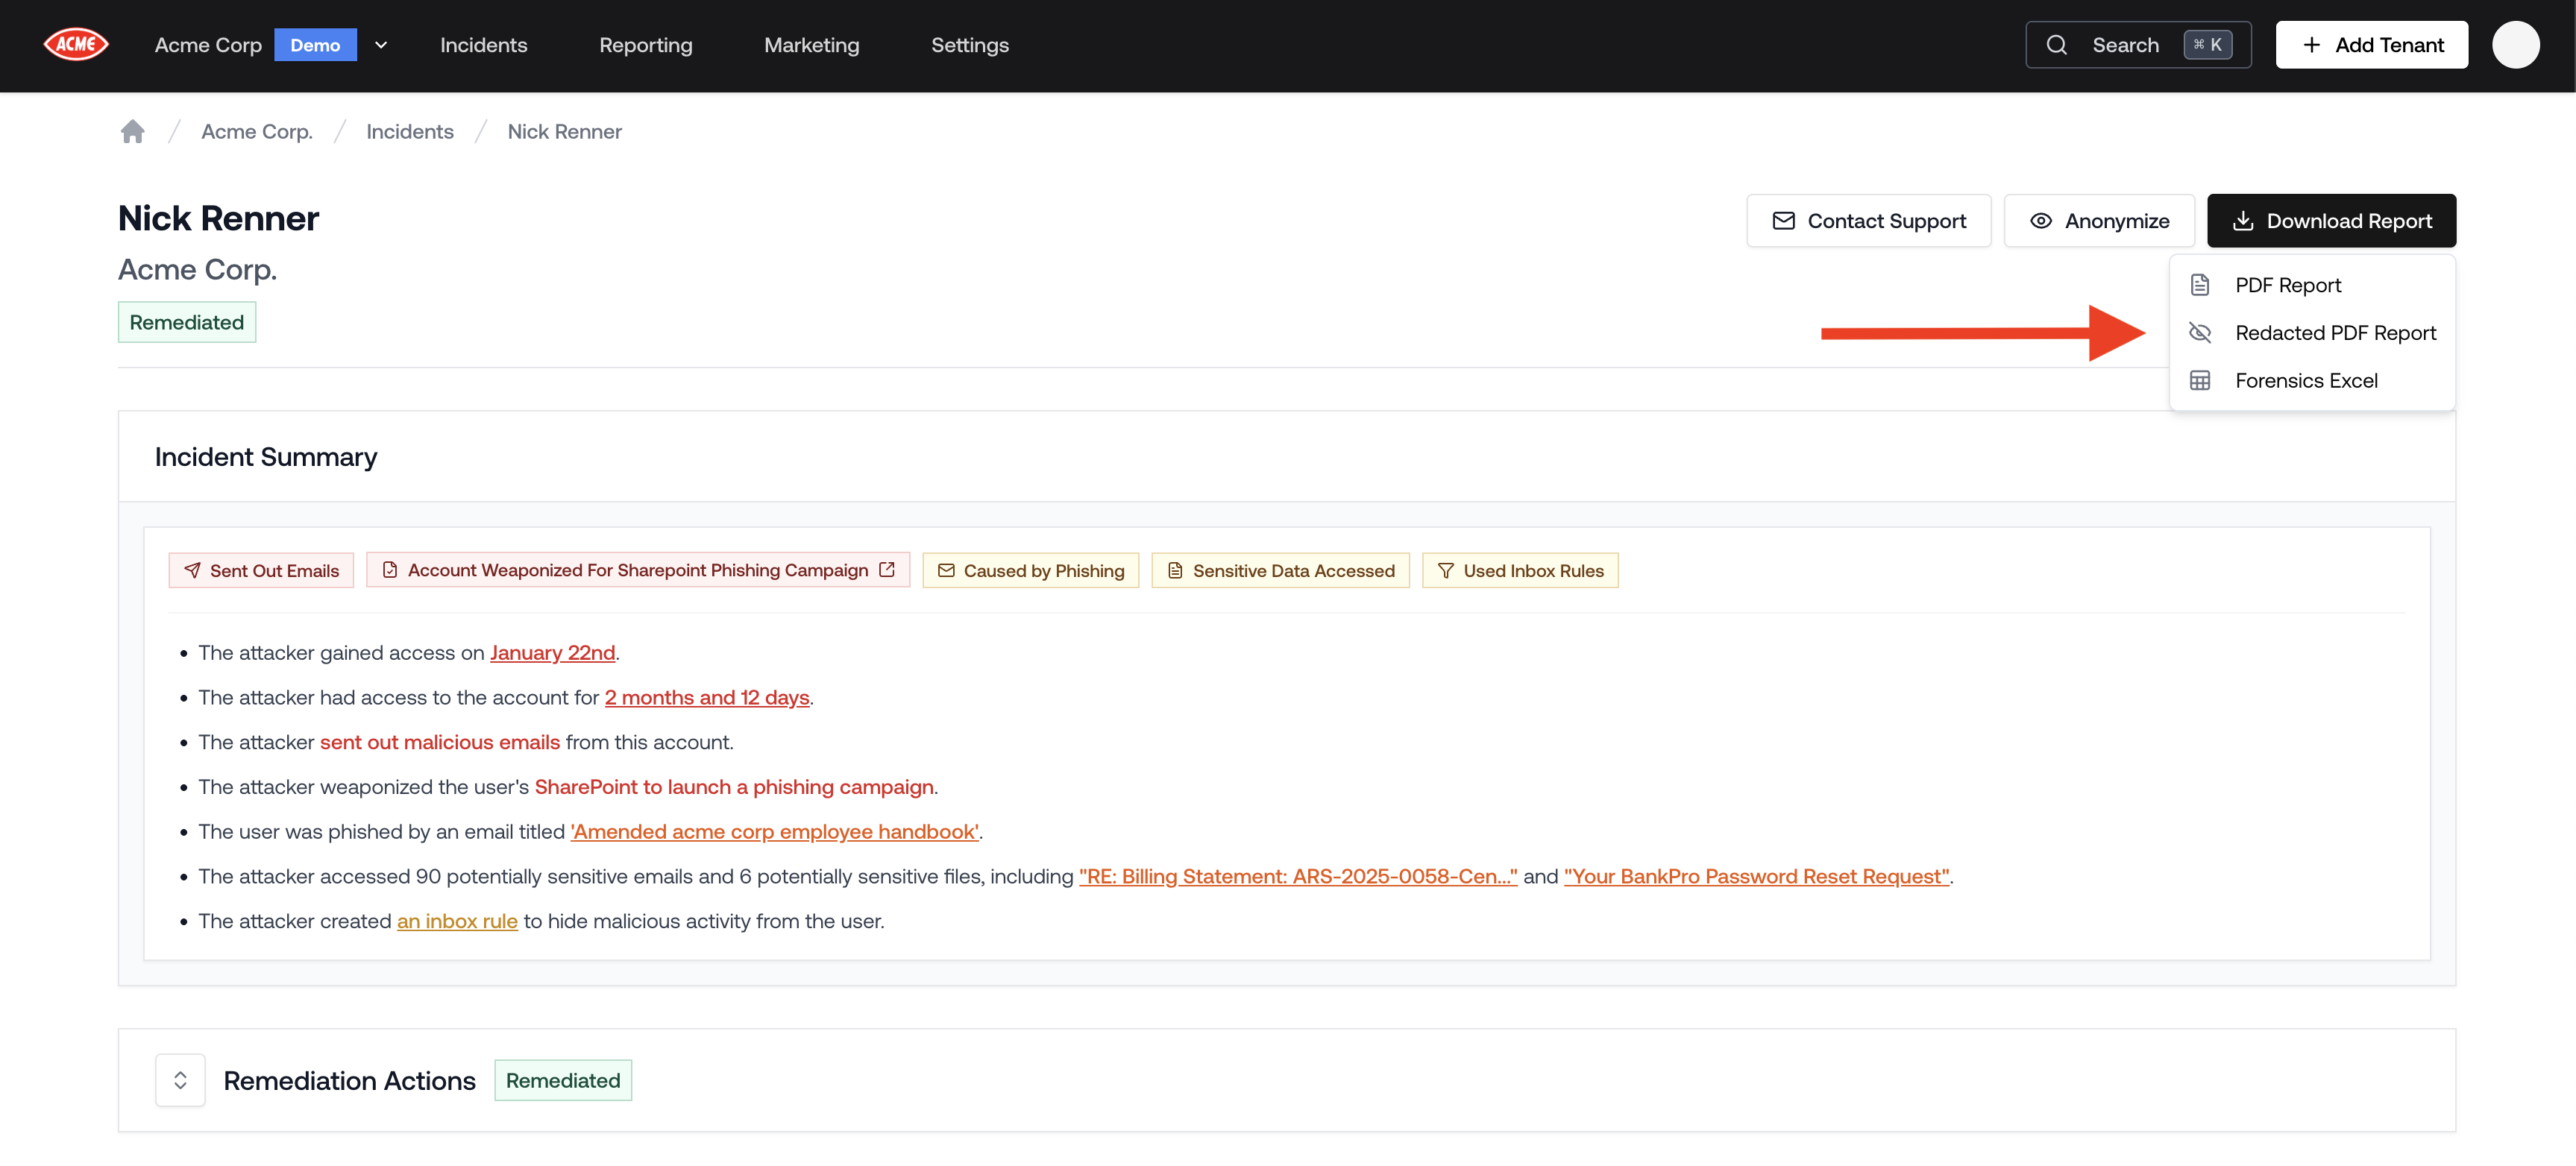
Downloading the Threat Remediation Report
- From the Homepage, navigate to the Incidents tab located at the top navigation bar.
- Open the incident.
- Click the Download Report button in the top right corner of the incident page.
Report Contents
- Executive Summary
- Impact of the attack, including duration and number of accessed resources
- Attack timeline, including the phishing email and the attacker’s activity
Customizing Report Branding
Threat remediation reports use the same white-label branding as tenant reports. To update the logo, organization name, or contact email that appear in the PDF, go to Settings → Branding. See Customizing Report Branding for details.Redacted Incident Reports
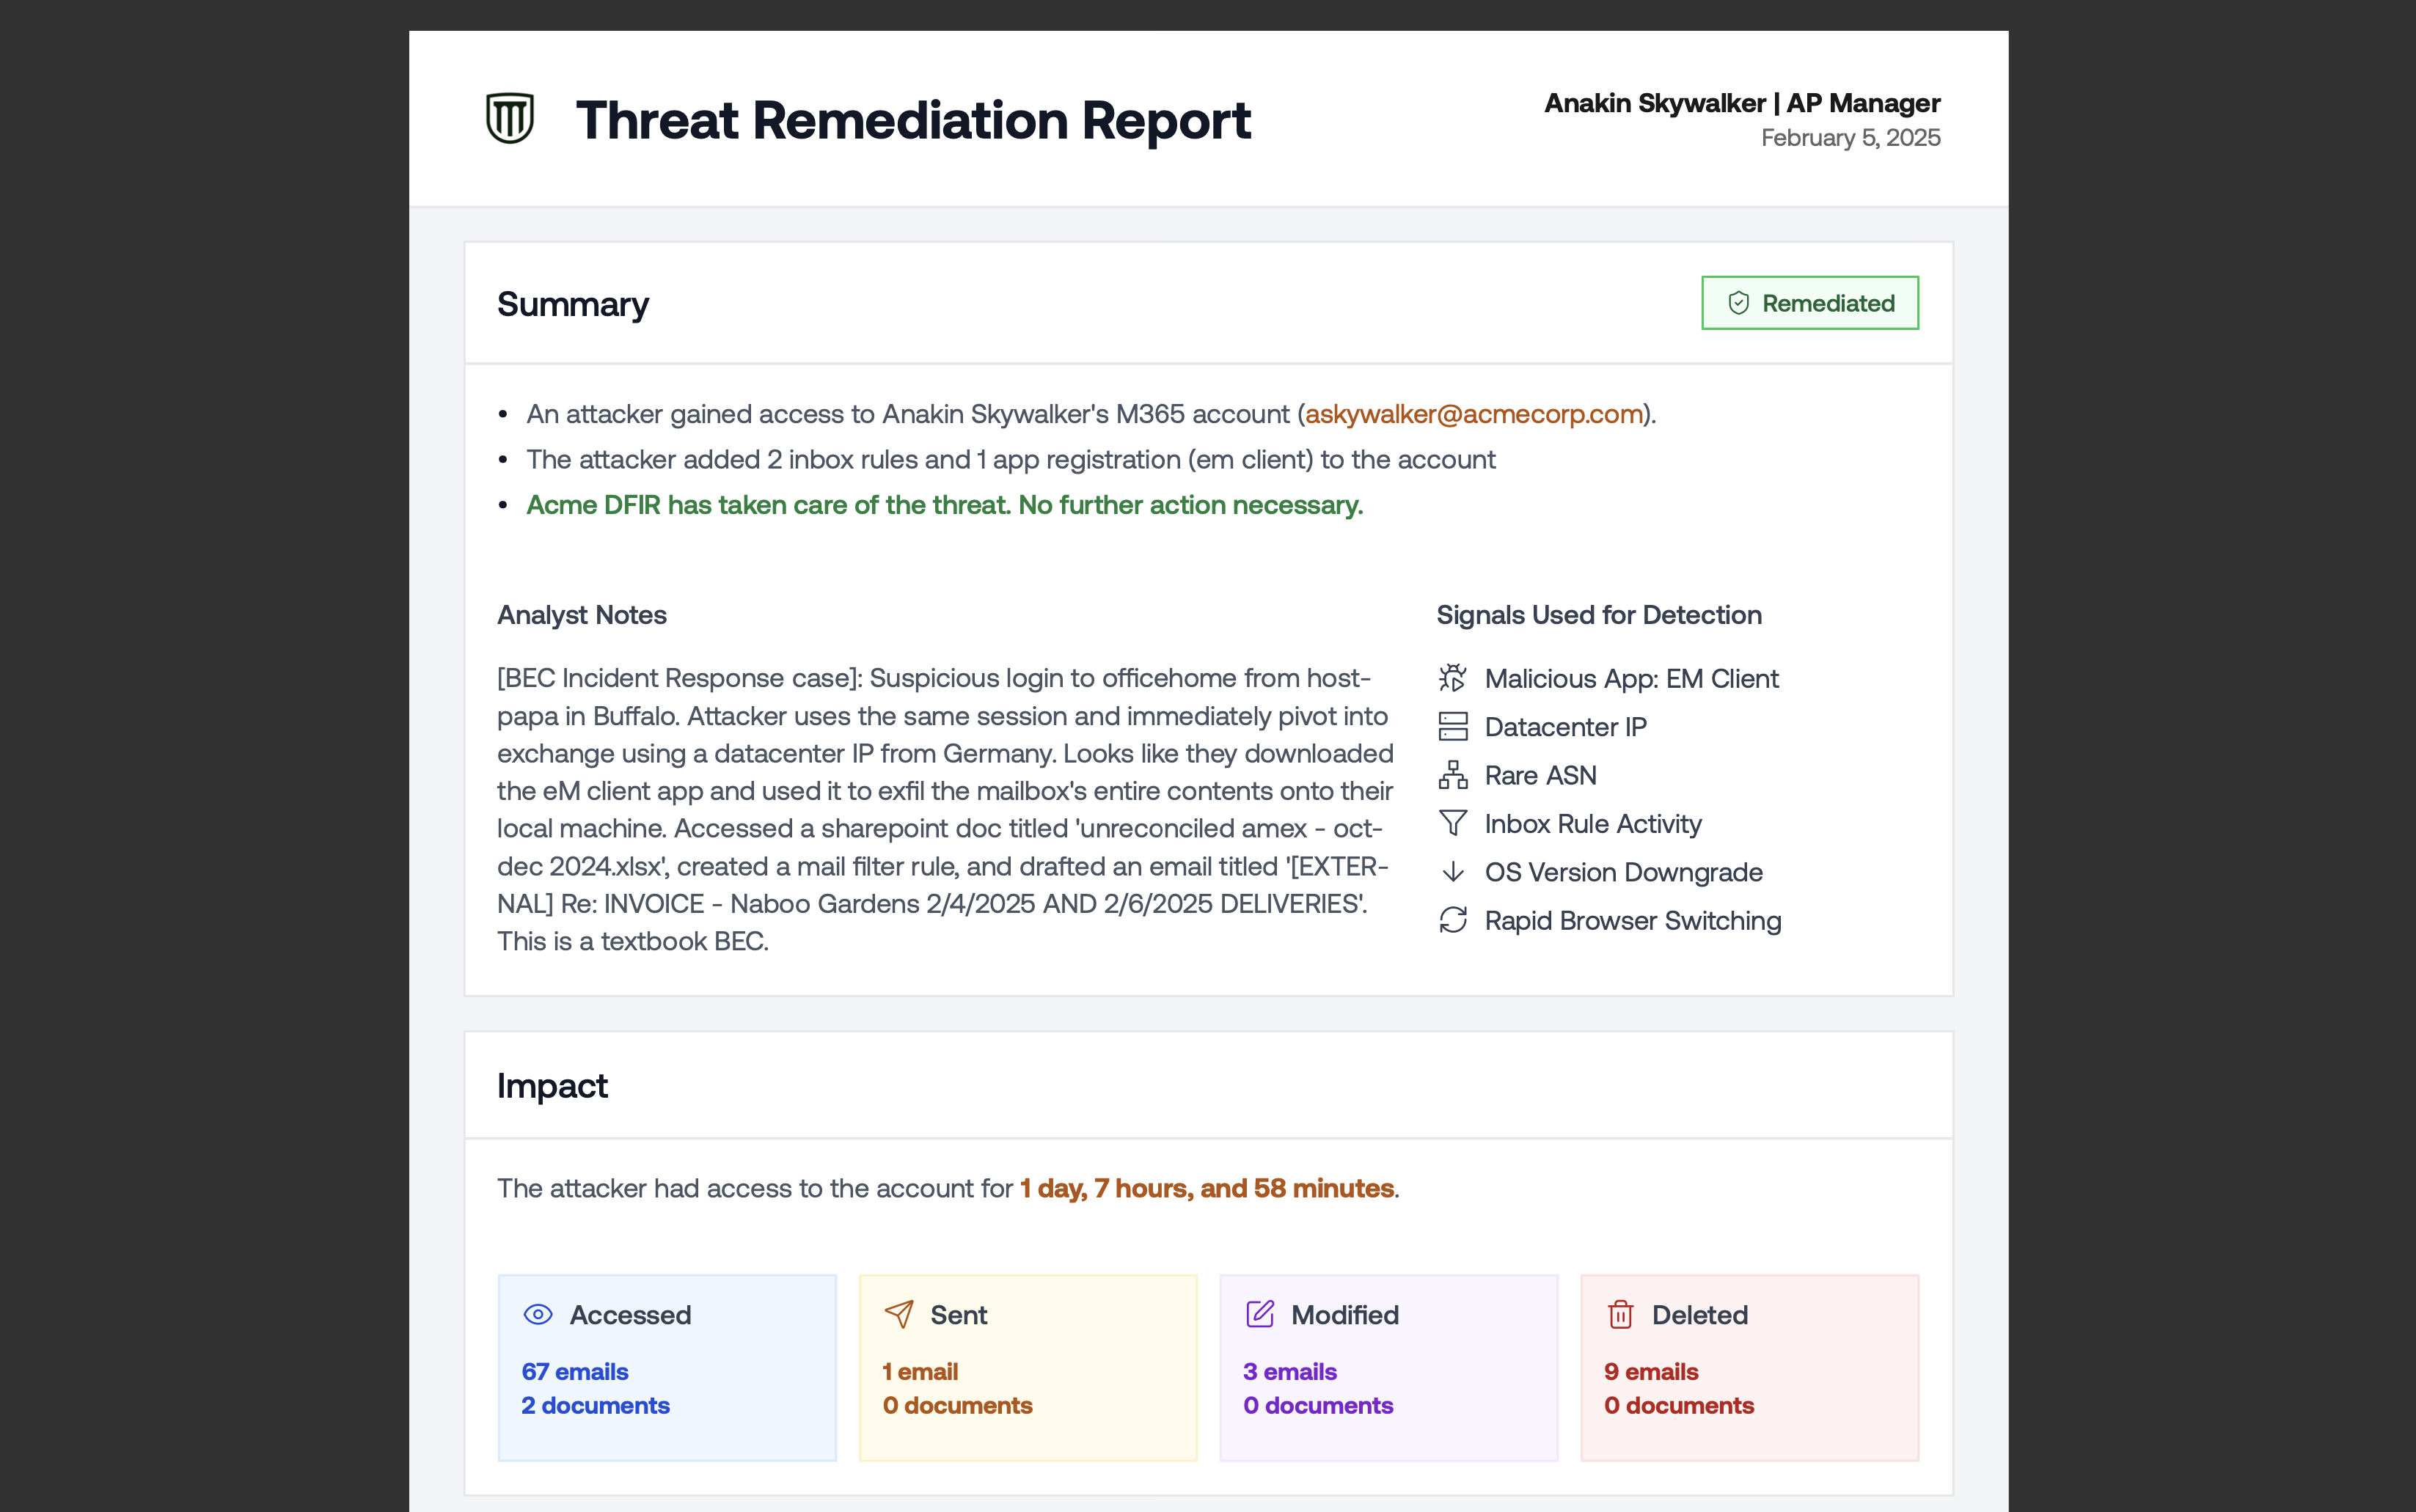
A Redacted PDF Report strips out all client-identifying information from the incident report so you can share real compromise data with prospects and other clients without exposing sensitive details. It’s the same forensic depth as the standard report (attack timeline, blast radius, persistence mechanisms, phishing evidence), with all PII replaced by redaction blocks. What gets redacted:- User emails and display names
- Email subjects and body content
- File names and document paths
- App names and IDs
- Inbox rule names and conditions
- IP addresses and location data
- Counts and statistics (emails accessed, documents touched, etc.)
- Dates and timestamps
- Remediation status (Deleted, Disabled badges)
- Section structure and attack narrative

Downloading the Redacted Report
- Open the incident.
- Click the Download Report button in the top right corner.
- Select Redacted PDF Report from the dropdown.