Partner Center
Connect your CSP account and onboard tenants in bulk through your existing GDAP relationships. No client action required.
Add Individually
Add a single tenant by signing in as (or sending a link to) the tenant’s Global Admin.
Via Partner Center
Partner Center integration connects Petra to your CSP account so you can discover, onboard, and manage all of your GDAP-managed tenants from a single page.- Click Add Tenant and choose Continue with Partner Center (or go directly to app.petrasecurity.com/portal).
- If this is your first time, click Connect Microsoft Partner Center and sign in with your MSP tenant credentials.
- After connecting, your managed tenants appear in a table. Click Onboard next to the tenant you want to add.
- Configure the Add Tenant modal and click Onboard Tenant.
Add Individually
Use this method when you do not have a Partner Center account, or when you need to add a single tenant outside of a GDAP relationship.Step 1: Sign in to Petra
Go to app.petrasecurity.com and sign in.Step 2: Click Add Tenant
Click Add Tenant from the navbar and choose Add tenants individually.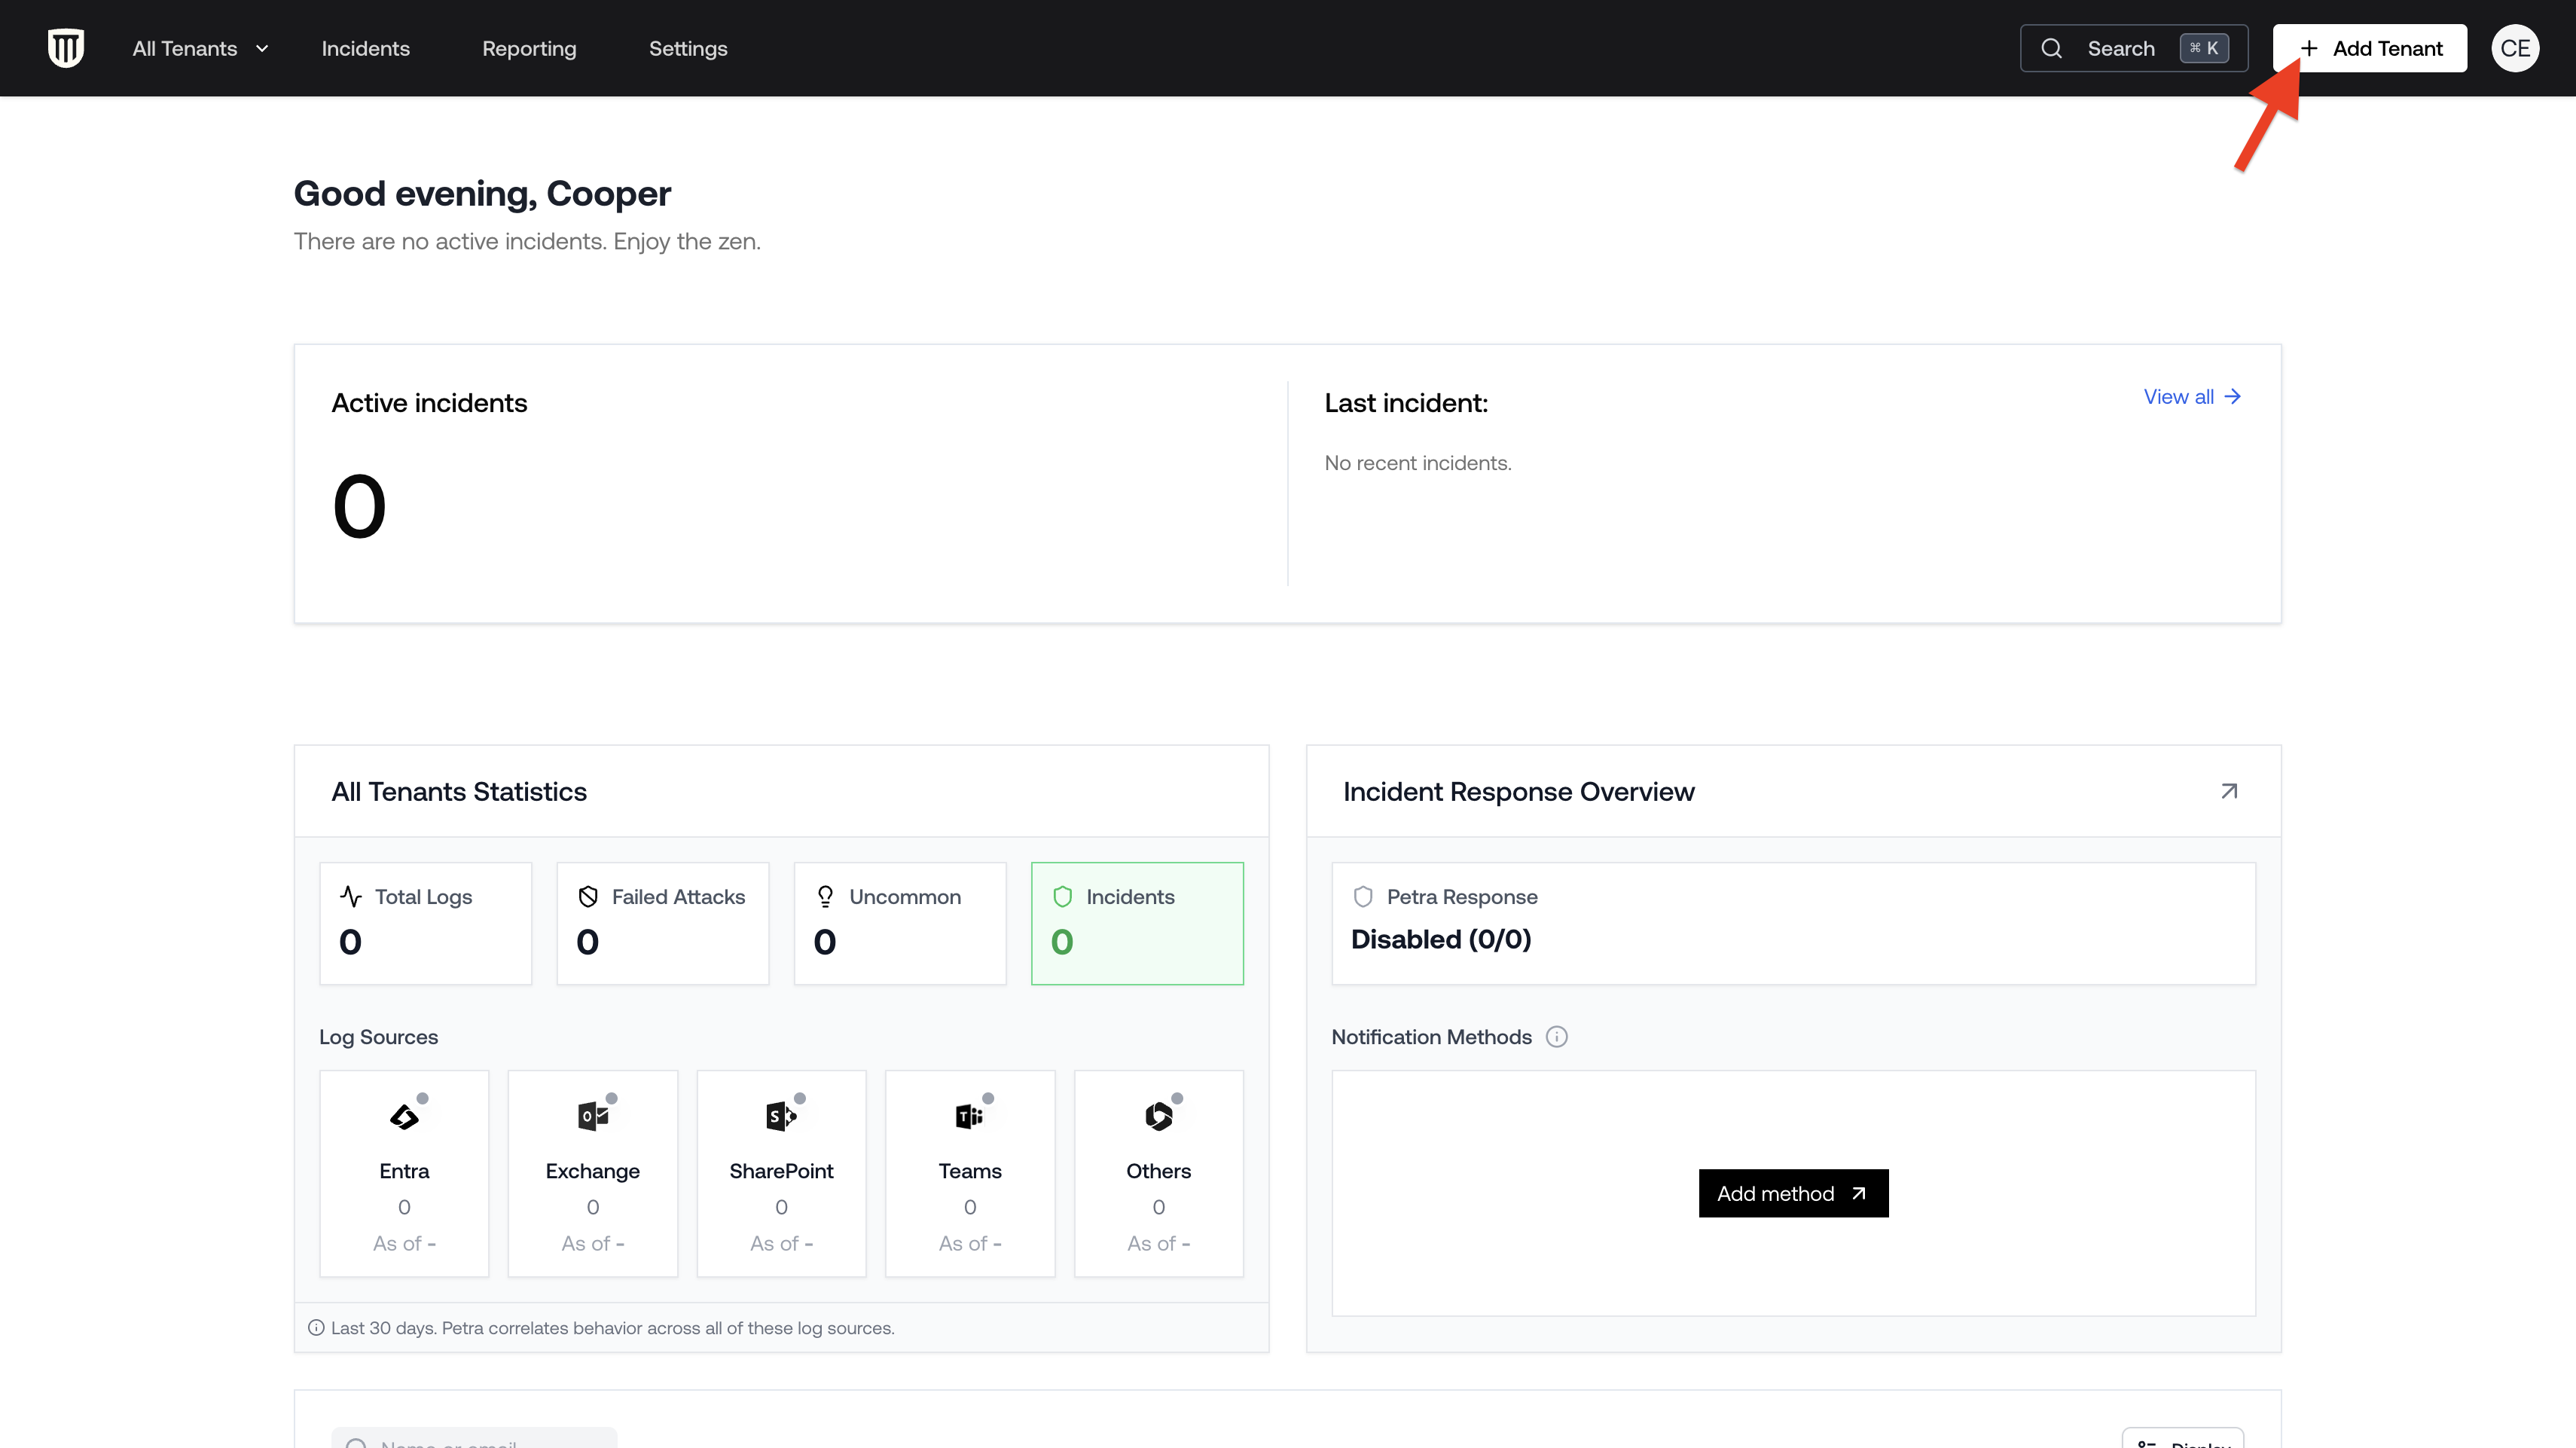
Step 3: Configure the onboarding
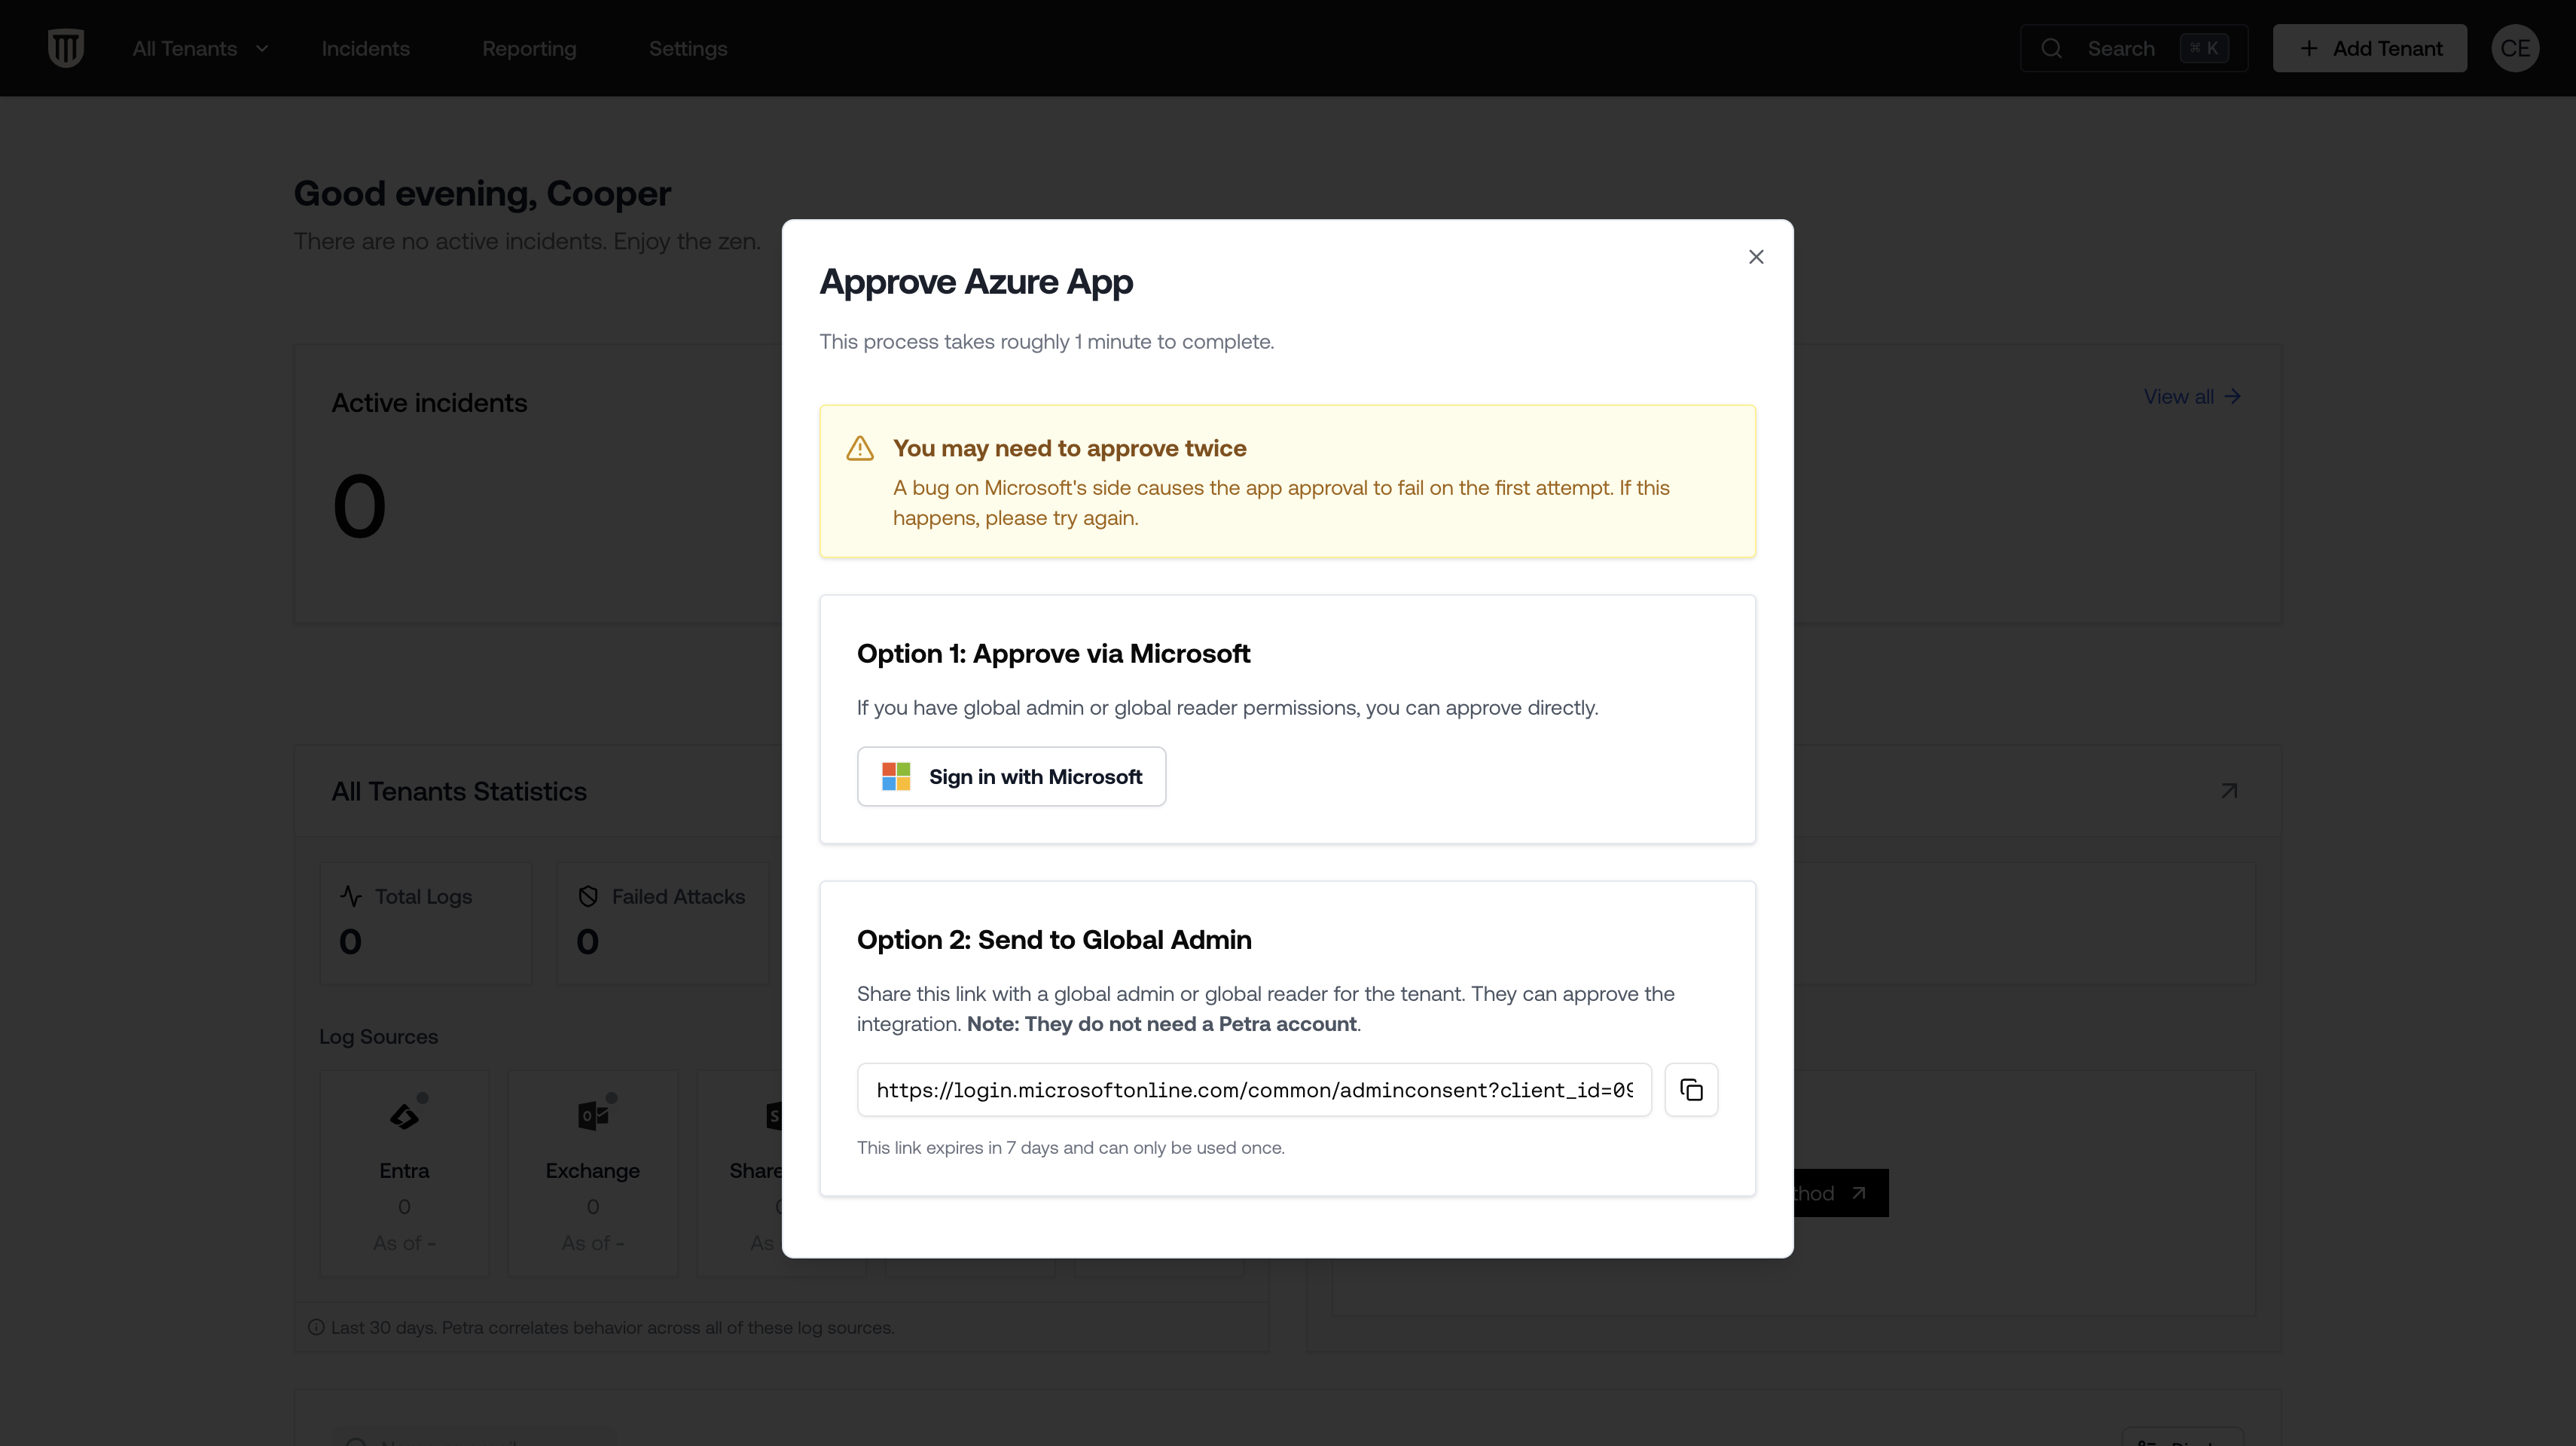
The Add Tenant modal opens. Review the defaults, adjust if needed (Petra Response, Scan-only), and check the onboarding summary. See Onboarding Configuration for details on what to expect from onboarding.Step 4: Add the Azure app
Click Onboard to proceed. You can either approve the app yourself (if you are a Global Admin on the tenant) or send the approval link to the tenant’s Global Admin.