Overview
The Remediation Actions panel guides you through the 6 steps of remediating an account compromise:- Revoke Sessions and Lock Account
- Retract Phishing Emails
- Disable Persistence Mechanisms
- Reset Password
- Re-enable Account
- Mark as Remediated
Step 1: Revoke Sessions and Lock Account
Revoke Sessions and Lock Account should be your first action when remediating a compromise
- Terminate all active user sessions
- Lock the compromised account
- Prevent further unauthorized access
Revoke Sessions and Lock Account works for all account types, including on-prem synced and
hybrid accounts.
Step 2: Retract Phishing Emails
Similar phishing emails are identified automatically and can be moved to Deleted Items.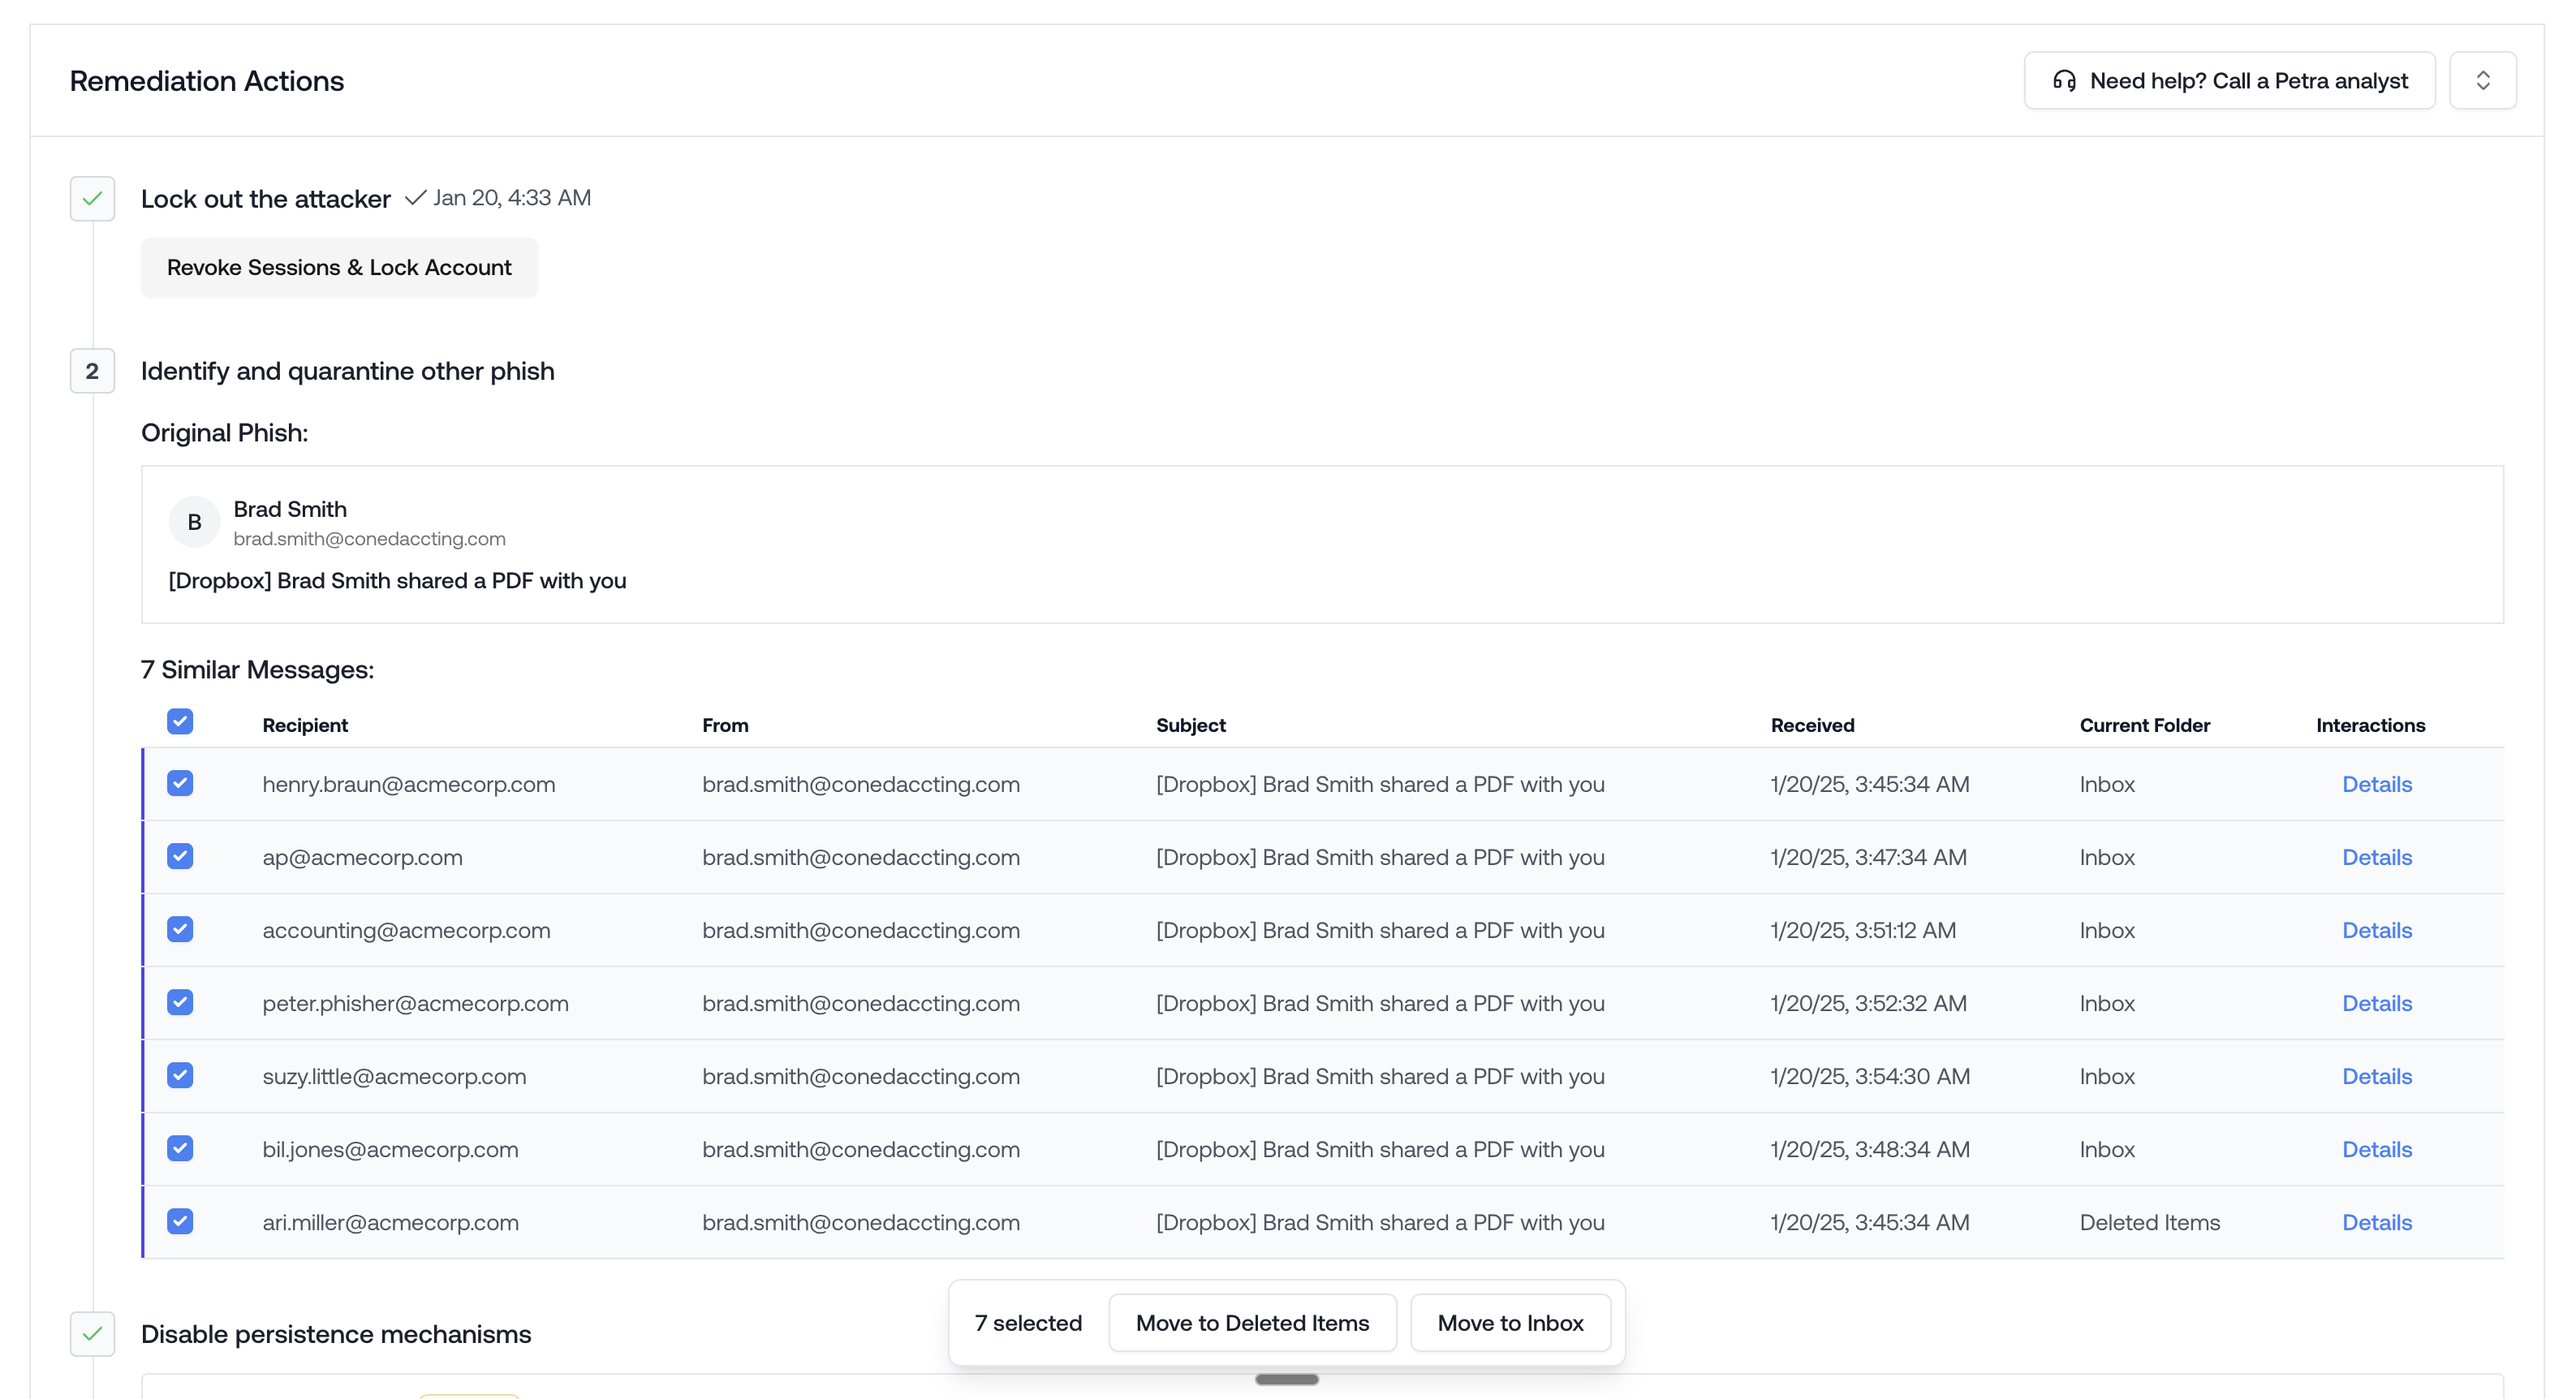
Mark as Phish
Petra tags the phishing email on the incident automatically in most cases. When it can’t, you’ll need to tag it yourself so that retraction, cross-tenant search, and reporting know which email is the phish. To tag manually: open the incident, find the suspicious email in the Exchange Logs, hover over it, and click Mark as Phish. The email will show a Phish badge next to the subject line once it’s tagged.Mark as Phish tags the email as the phishing email for the incident. It does not remove the email from inboxes. Use the retraction button in Step 2 to move it to Deleted Items across the tenant, or Cross-Tenant Phish Removal for matching emails across other tenants.
Cross-tenant phish retraction
If you manage multiple tenants, Petra identifies matching phishing emails across all of your managed tenants and surfaces them in the Cross-Tenant Phish panel below the tagged phish in the incident’s Remediation Actions panel. This panel shows each tenant where the same phish was found, along with the sender, subject, and affected mailboxes. You can select individual emails or entire tenants for retraction. Clicking a tenant name opens that tenant’s Email tab with the subject and sender filters pre-populated, so you can review before taking action.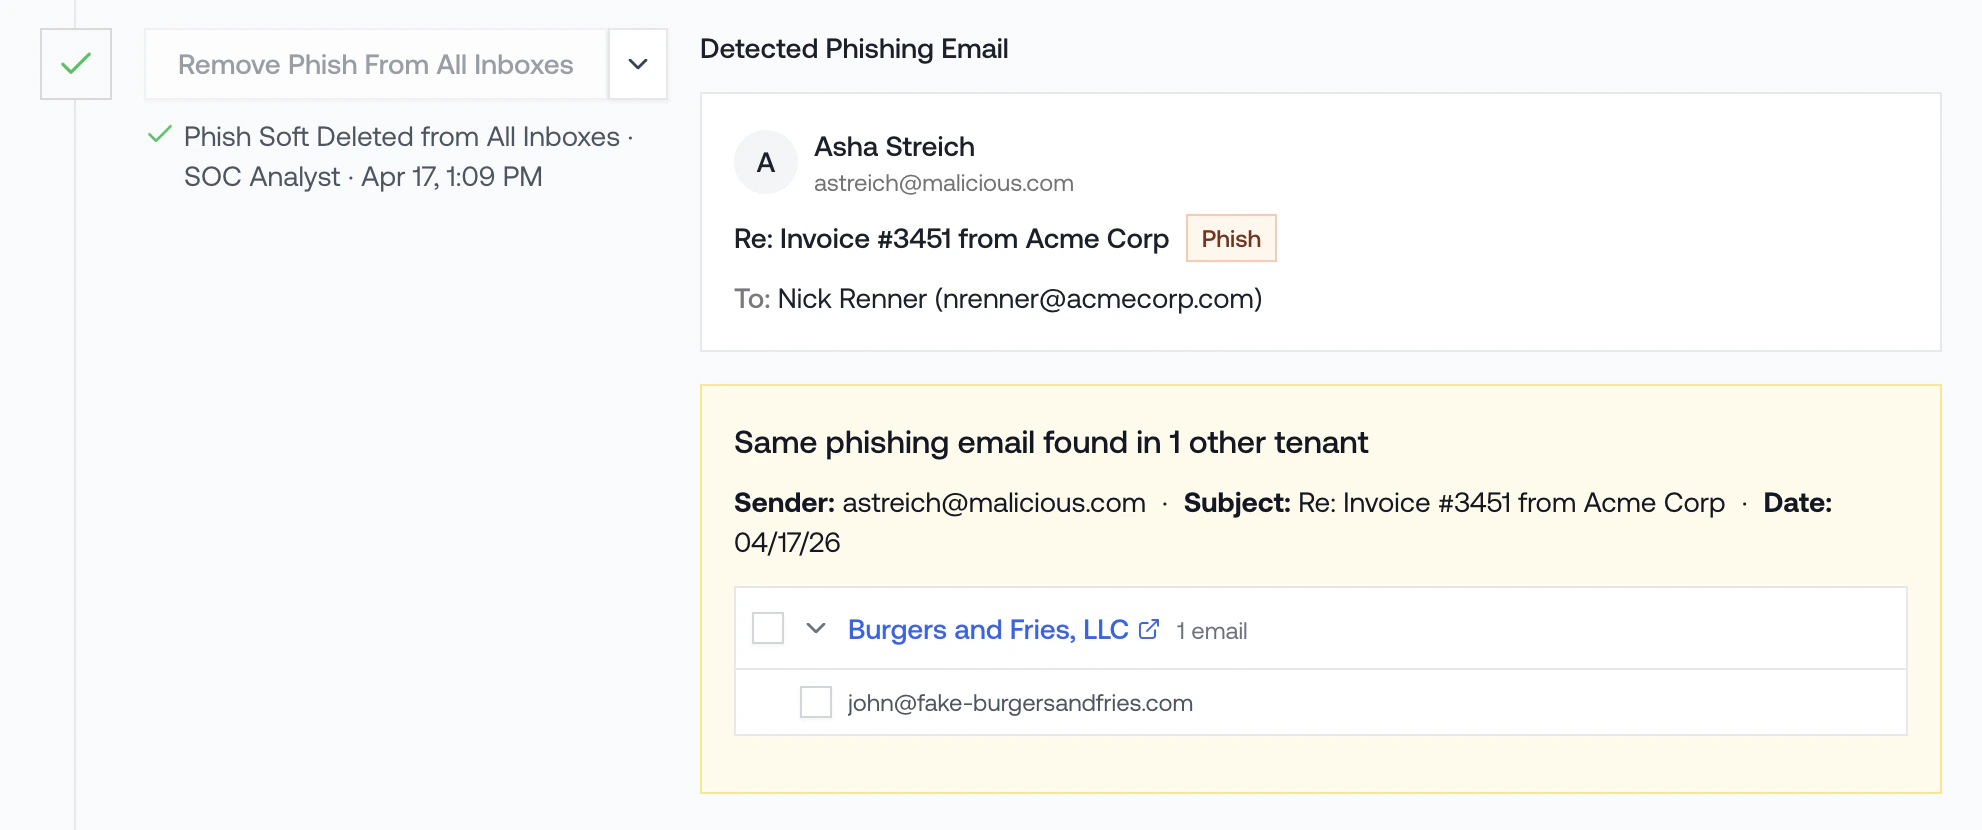
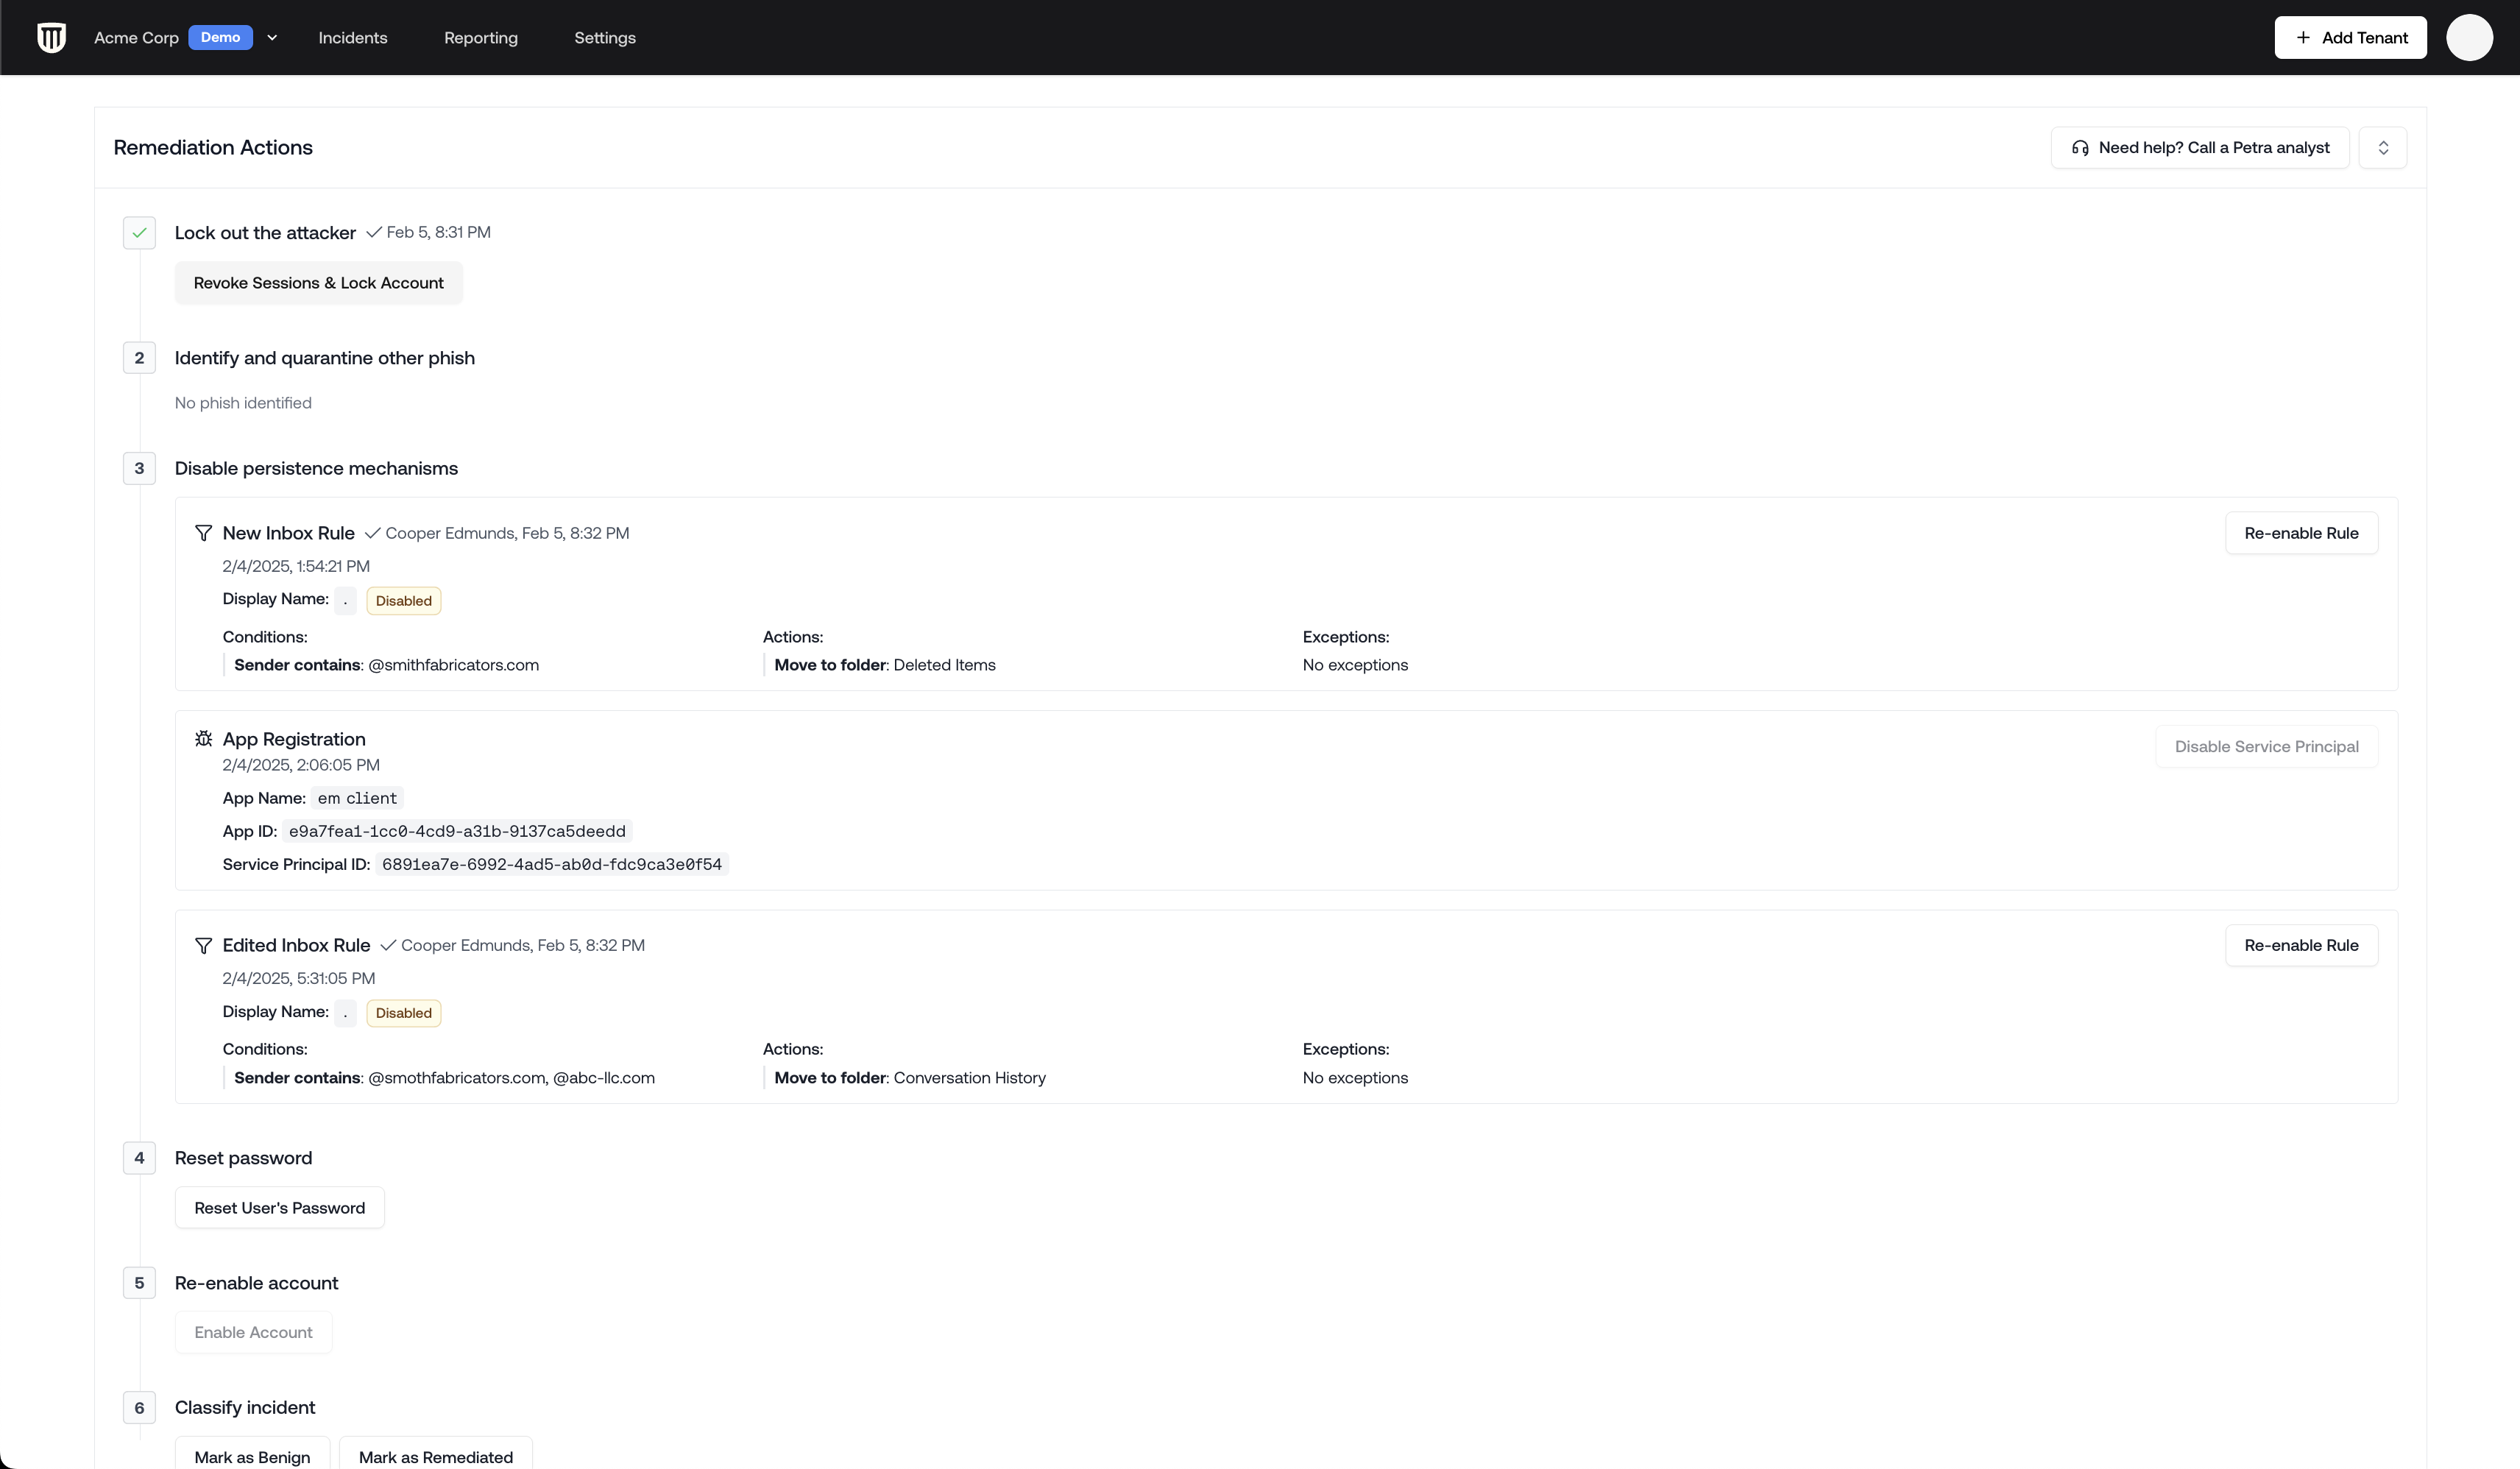
Step 3: Disable Persistence Mechanisms
Attackers often create persistence mechanisms to maintain access even after password changes. Petra identifies these mechanisms and lets you one-click disable them. These include:- Mail filter rules
- App registrations
- Service principals
- Malicious device registrations
- Phishing emails sent internally
- Phishing emails still in mailboxes in your environment

Step 4: Reset Password
After removing all persistence mechanisms:- Click the “Reset Password” button. This will generate a new password string and apply it to the account. It will then show you that new password.
- Communicate the new password securely to the user. We recommend calling them.
Step 5: Re-enable Account
After resetting the password, you can re-enable the account.Step 6: Mark as Remediated
Once all remediation steps are complete:- Click “Mark as Remediated”
- This changes the incident status to “Remediated”
- The remediation panel will auto-hide for cleaner viewing
Post-Remediation
After remediation, the incident page remains available for:- Generating incident reports
- Exporting data to share with clients
- Reviewing the incident timeline and details
- Further investigation if needed
You can always expand the remediation panel again if you need to review or modify any remediation
actions taken.